Paint chips occur due to stones flying up from the road, loose gravel, minor parking impacts or debris hitting the surface of your car at speed. They expose the underlying layers of the car’s paint, allowing moisture and oxygen to invade, which leads to rust, dull patches, and a noticeable dullness.
Prompt paint chip repair helps prevent rust formation, maintains your car’s visual appeal, and protects its resale value. The good thing is: small to medium-sized paint chips can be repaired at home, even by a beginner.
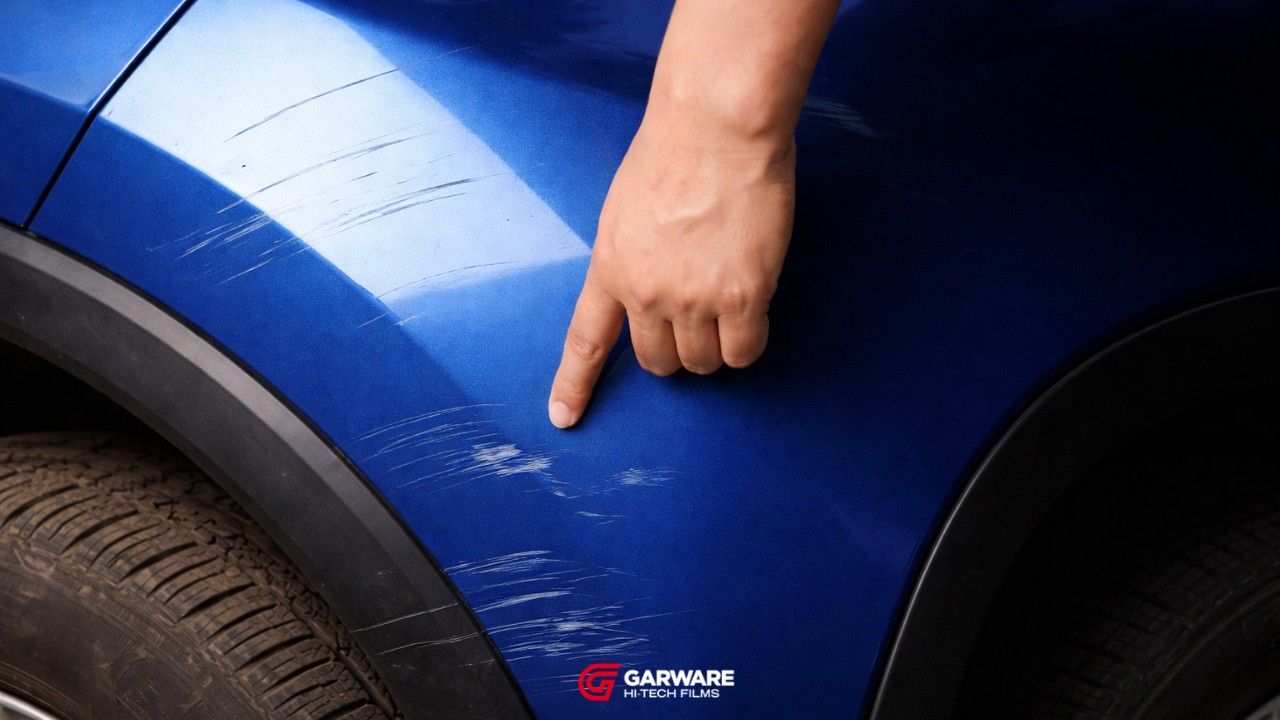
Wondering how to repair chipped paint on a car at home?
Let’s explore what causes paint chips, their types, and a step-by-step car paint chip repair guide to help you achieve clean, neat results without visiting a car body shop.
What Causes Paint Chips on a Car?
Chips on the car’s paint happen naturally while driving the car around the city daily. Some common causes are:
-
Small stones kicked by tyres.
-
Prolonged sun exposure, acid rain and temperature changes.
-
Tight parking spaces.
-
Small debris striking the vehicle while driving on the highway.
Types of Paint Chips
Understanding the various types of paint chips helps in determining the technique you can use to fix paint chips on your car.
-
Surface-level chips: The clear coat is damaged and is easy to fix.
-
Medium chips: A layer of paint gets removed, but the primer stays intact.
-
Deep chips: The damage affects bare metal, increasing the risk of rust.
-
Multiple clustered chips: Occur due to bumpers and bonnet, requiring care for an even look.
Tools & Materials Needed
Before starting the paint chip repair, it is important to keep all the required tools and materials ready. Your car paint chip repair kit should include:
-
Automotive touch-up paint or paint pen: Helps restore the chipped area using your car’s original paint shade for a natural finish.
-
Primer: Required when the chip exposes the metal or base layer, as it prevents rust and improves paint adhesion.
-
Clear coat: Seals the repaired area and adds protection while restoring shine.
-
Sandpaper or micro-abrasive pads (1000 - 3000 grit): Smoothens rough edges and helps the new paint blend evenly.
-
Rubbing alcohol or wax and grease remover: Cleans the surface by removing dirt, oil, and wax before painting.
-
Clean microfiber cloths: Used to wipe the area without scratching the paint.
-
Disposable gloves: Keep the repair area free from fingerprints and protect your hands.
-
Masking tape: Covers nearby panels and prevents paint from spreading beyond the chipped area.
Having these tools prepared in advance makes the car paint chip repair process easier and more effective, even for beginners.
Step-by-Step Guide: How to Fix Paint Chips on a Car
Step 1: Clean the Chipped Area
-
Begin by cleaning the chipped area with car shampoo and water.
-
Dry thoroughly.
-
Apply some rubbing alcohol or wax remover if there is any oil or residue.
Ensure the surface is dry, as it is essential for good paint adhesion.
Step 2: Remove Loose Paint
If soft or peeling edges of paint are present, lift them with a toothpick or another fine-pointed tool. Avoid enlarging the chip.
Step 3: Sand the Chip Area (if necessary)
Scrape lightly around the paint chip to remove any rough transitions. Sanding smooths rough edges and helps the new paint blend more evenly with the surrounding surface.
Step 4: Apply Primer (If Chip is Deep)
If the chip exposes metal, cover it with a thin layer of primer. Let it dry, as directed by the manufacturer.
Step 5: Apply Touch-Up Paint
Using your car’s exact paint code, apply the touch-up paint in thin layers. Allow each layer to dry before adding the next, gradually building the paint until it sits level with the surrounding surface.
Step 6: Apply Clear Coat
Once the paint has dried, apply a clear coat to seal the repair. This brings back the shine and protects your car’s paint against UV and moisture.
Step 7: Polishing (optional)
Once fully cured (usually 24 to 48 hours), you can gently buff out the area to help blend and shine.
Common Mistakes You Can Avoid
Some common mistakes owners make while doing DIY car paint repair are:
-
Applying too much paint leads to bubbles and uneven application.
-
Skipping proper cleaning before painting.
-
Ignoring the clear coat step.
-
Applying the wrong or mismatched paint colour.
-
Polishing before the paint has cured completely.
When to Seek Professional Help
DIY car paint repair works best when a small area is affected. Seek professional help if:
-
The chips on the car’s paint are big, deep or widely scattered.
-
Rust has already formed.
-
The car has metallic, pearl, or special-effect paint finishes that are difficult to match.
Tips to Prevent Future Paint Chips
It's always better to prevent damage than to fix it. Here are some simple habits and measures you can take that will help in preventing future damage:
-
Keep a safe distance between vehicles during traffic ahead, especially trucks.
-
Apply paint protection film (PPF) to high-impact areas such as the bonnet and bumper. However, full coverage is often the best.
-
Opt for premium solutions, such as Garware Paint Protection Films, that help absorb stone impacts and protect factory paint without altering appearance.
-
Use a ceramic coat for added surface hardness.
-
Drive carefully when you are in a gravel or construction area.
Takeaway
Paint chips may seem like a small issue, but ignoring them can lead to long-term damage. With the right tools and a careful approach, beginners can successfully fix minor chips at home and restore their car’s appearance.
For lasting protection, combining timely repairs with preventive measures like PPF offered by Garware Hi-Tech Films ensures your car’s paint stays intact and visually appealing for years, if maintained properly.
FAQ
1. What is the easiest way for beginners to fix paint chips on a car?
Using a paint pen for small chips is the simplest and most beginner-friendly method.
2. Do I need primer for repairing small paint chips?
Primer is only necessary if the chip exposes metal or the base layer.
3. How do I find the exact paint code for my car?
Check the sticker under the bonnet, door frame, or refer to the owner’s manual.
4. Can deep paint chips cause rust if not repaired?
Yes, exposed metal can quickly rust if left untreated.
5. Is touch-up paint permanent or temporary?
When done correctly and sealed with a clear coat, it offers a long-lasting solution.
6. Can I fix paint chips without sanding?
Very small surface chips may not need sanding, but sanding improves blending.
7. How long does touch-up paint take to dry?
Most paints dry within a few hours but need 24 - 48 hours to fully cure.
8. Should I apply a clear coat after touch-up paint?
Yes, clear coat protects the repair and restores shine.
9. Can I repair multiple chips at once?
Yes, but work on one area at a time to ensure even application.
10. When should I take my car to a professional instead of DIY?
For large damage, rusted areas, or complex paint finishes, professional repair is the safer option.
Disclaimer
This blog is for general informational purposes only. While efforts are made to ensure accuracy, the content may not always be current or complete. Garware Hi-Tech Films is not responsible for any actions taken based on this information